A Jenkins master comes with the basic installation of Jenkins, and in this configuration, the master handles all the tasks for your build system.
If you are working on multiple projects, you may run multiple jobs on each project. Some projects need to run on some nodes, and in this process, we need to configure slaves. Jenkins slaves connect to the Jenkins master using the Java Network Launch Protocol.
Jenkins Master and Slave Architecture

The Jenkins master acts to schedule the jobs, assign slaves, and send builds to slaves to execute the jobs.
It will also monitor the slave state (offline or online) and get back the build result responses from slaves and the display build results on the console output. The workload of building jobs is delegated to multiple slaves.
Steps to Configure Jenkins Master and Slave Nodes
Click on Manage Jenkins in the left corner on the Jenkins dashboard.
Scroll down, Click on Manage Nodes and clouds.

Select New Node and enter the name of the node in the Node Name field.

Select Permanent Agent and click the OK button. Initially, you will get only one option, “Permanent Agent.” Once you have one or more slaves you will get the “Copy Existing Node” option.

In the above screen shot, Parallel_Agent_01 was Created and currently it is in offline mode.

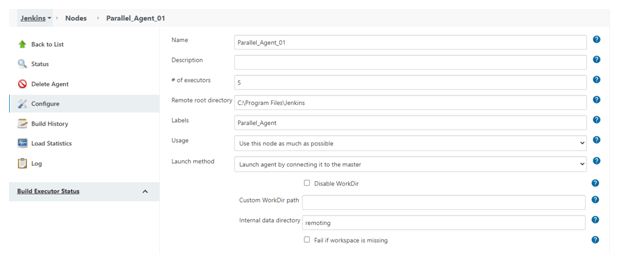
Click on configure, Provide the details.
Name -Parallel_Agent_01,
Number of executors- 5
Remote root directory– We have to provide Jenkins path
Labels-Parallel_Agent
Launch method-Launch agent by connecting it to the master
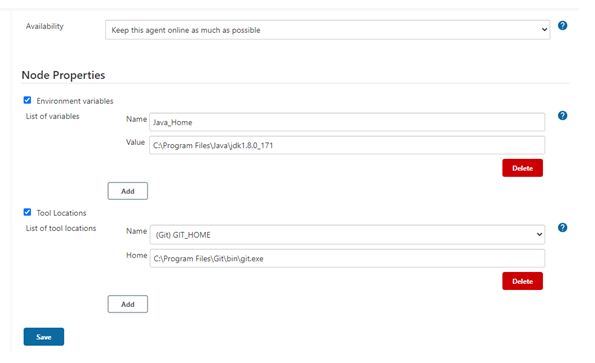
Node Properties Tab:
Check Environment variables
- Provide the Java path
Check Tool Locations:
- Provide the Git path and click on save button.

Click on Go to security configuration screen and change it. It will redirect to Configure Global Security -> Agents -> click on Fixed radio button port: 49187 and click on save Button. Go back to Nodes settings.

We can see the above screen,
Click on Launch button, it will download the launch agent in your system.
Jenkins- slave.exe file should copy in the Jenkins folder which you installed in your system.

3. Double Click on jenkins – slave.exe.
4. Run the launch agent, click on run button and it will show connected.
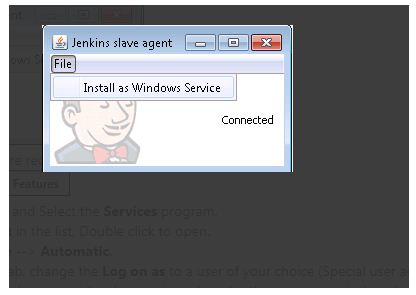
5. In below screen shot, we can see the connected popup, click on file menu, select the install as service and click yes button . Once it is done, refresh the page.

In above screenshot, we can see the Build executors. One is master and other is Parallel_agent_01
In Master node, we can see number of executors as 2.
In Parallel_agent_01, we can see number of executors as 5.
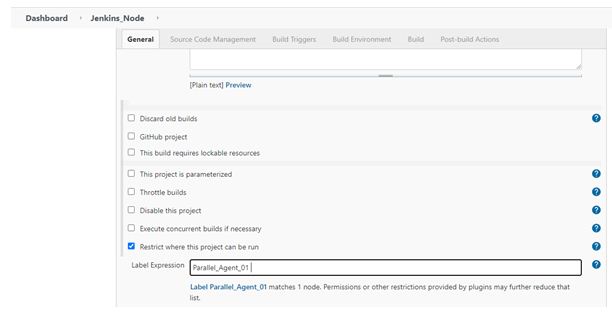
- Go to build job -> configure
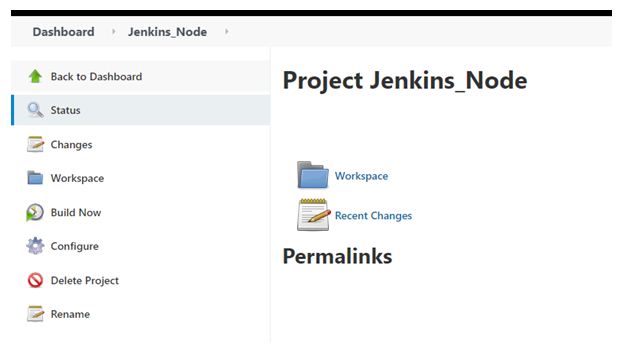
In General tab, check on Restrict where this project can be run.
In Label Expression, we have to select node name where we need to execute the build job.
We can create the more number nodes as well.
I am Sunil kumar, Please do follow me here and support #devOps #trainwithshubham #github #devopscommunity #devops #cloud #devoparticles #trainwithshubham
Connect with me over linkedin : linkedin.com/in/sunilkumar2807
