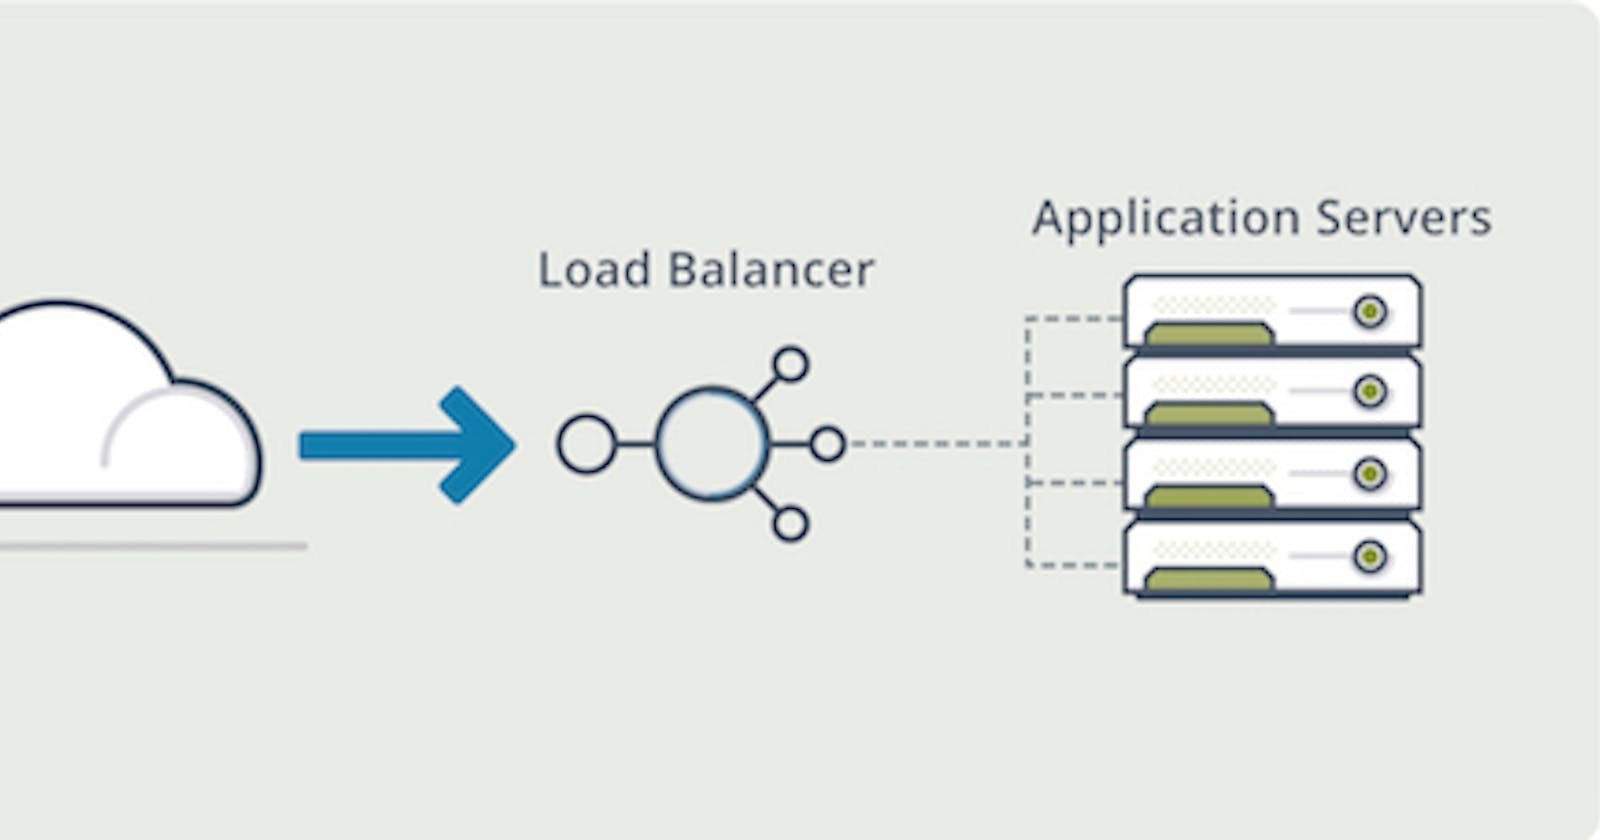


Load Balancer Concept
Google Cloud LB is smart. It offers more than a traditional one.
HTTP/2 enabled
Terminate SSL handshake
Custom SSL/TLS policies
Route traffic to the nearest server
Path-based routing
Auto-scaling
and a lot more…
The following, I have two servers (one in the US and another one in the UK). Let’s create a load balancer and route traffic to both the servers.

Since Google offers auto-scaling, you have multiple options and choose what your business requires. However, in this article, I will explain how to create a load balancer using unmanaged instance groups which don’t support auto-scaling.
Create Instance Groups
All the servers should be inside the instance groups. So this is a pre-requisite to creating an LB.
Login to GCP Console
Navigate to Compute Engine >> Instance groups
Click create instance group
Enter the name, select zone as a single, region where your servers are, unmanaged instance group, choose the server from VM instance drop-down and click Create

A single zone can add servers only from that zone. Since I’ve servers in the UK and US, then I got to create a two instance group. I’ll repeat the procedure to add my another server (server-uk).

And, those two groups are created.

Create an HTTP(s) LB
Google offers three types of LB.
HTTP (s)
TCP
UDP
To manage web application traffic distribution, HTTP(s) is suitable. Let’s create that.
Navigate to Network Services >> load balancing
Click Create a load balancer
- Start configuration for HTTP(s) load balancing
Enter the LB name
On backend configuration tab, select the drop-down and create a backend service
Enter the name and select backend type as instance groups
Add both instance groups (server-us and server-uk)
Adjust the port number – port number of web server or application will be listening on the servers
Under health check, click create
Enter the name, select the protocol, port
A health check is essential for LB to know which instance is down, so it stops sending traffic. Below, I am instructing LB to hit the server IP with port 80 every 10 seconds. If a server doesn’t response three times consecutively then, LB will mark that instance down.
Click save and continue to create health
Click create on backend service wizard
It will show like below
On host and path rules tab, ensure newly created backend services (geekflarelab in my case) is selected
On frontend configuration tab, enter the name and create new IP address.
It will popup to reserve a new static IP address. Give the name there and click reserve.
Click Done
Note: its recommended to get the static IP for your LB so you can use that to point to your domain.
On the review tab, ensure all good and once happy click Create
It will take a few seconds to create, and you should see them on the list. When you click on the newly created LB, it will show the details like below.
As you can see both instances are healthy and LB is technically operational.
Next, you got to update your domain A record to point to the LB frontend IP. Once done, when you hit your domain, it should hit to LB and distribute traffic to the instances.
I did some load test and here is the result.

You can see the traffic from Europe is getting routed to the nearest server located in London, and North America and Asia traffic are to US server. The good thing is you don’t have to configure anything for geo traffic routing, its default feature. The above monitoring is available under backends tab.
Conclusion
Creating an LB is easy, and I hope this gives you an idea about it. There is a lot of configuration you can do to meet your application requirement like session affinity, CDN integration, SSL cert, etc. If you are exploring an option to have a load balancer for your application, then play around and see how it helps.